Technicals

Add as a preferred source on Google

FxWirePro: AUD/JPY bulls take a breather at 110W EMA, bullish bias intact for now

AUD/JPY chart - Trading View AUD/JPY is extending upside for the 5th straight session and has gained a massive 4.86% for the week. Price action is extending break above 200-DMA and has taken out 88.6% Fib at 74.64. Momen…

1 min read
FxWirePro: AUD/JPY bulls take a breather at 110W EMA, bullish bias intact for now
Image from the original EconoTimes article

Read the original article

AUD/JPY chart - Trading View 

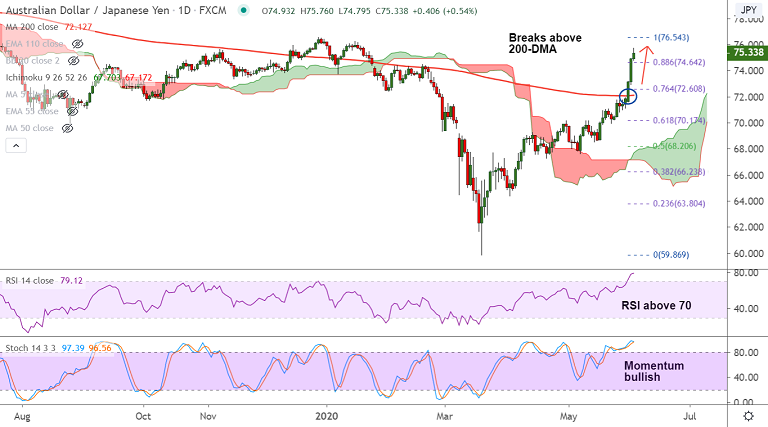
AUD/JPY is extending upside for the 5th straight session and has gained a massive 4.86% for the week.

Price action is extending break above 200-DMA and has taken out 88.6% Fib at 74.64.

Momentum studies are strongly bullish. Overbought oscillators could caused minor pullbacks.

Major trend in the pair is bullish as evidenced by the GMMA indicator. Widening Bollinger bands suggest rising volatility.

110W-EMA is offering stiff resistance at 75.77. Upside intact as long as pair holds above 200-DMA. 

Break above 110W EMA eyes Dec 2019 high at 76.54. Further bullish momentum eyes 200W SMA at 80.03.

Support levels - 74.64 (88.6% Fib), 73.34 (5-DMA), 72.12 (200-DMA)

Resistance levels - 75.77 (110W EMA), 76.54 (Dec 2019 high), 80.03 (200W MA)
 

Related articles

View all
Technicals

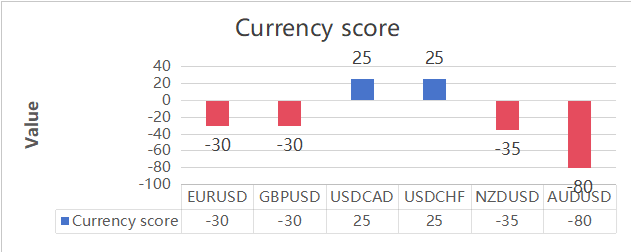
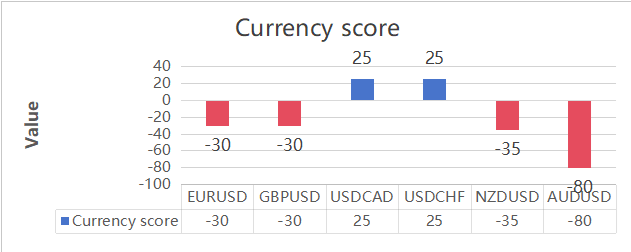
Major Pair Currency Score: AUDUSD Bearish

EURUSD - Levels to watch - 1.100 GBPUSD Levels to watch - 1.3180 USDCHF Levels to watch - 0.8400 USDCAD - Levels to watch - 1.4300 AUDUSD - Levels to watch - 0.7000 NZDUSD - Levels to watch - 0.5560