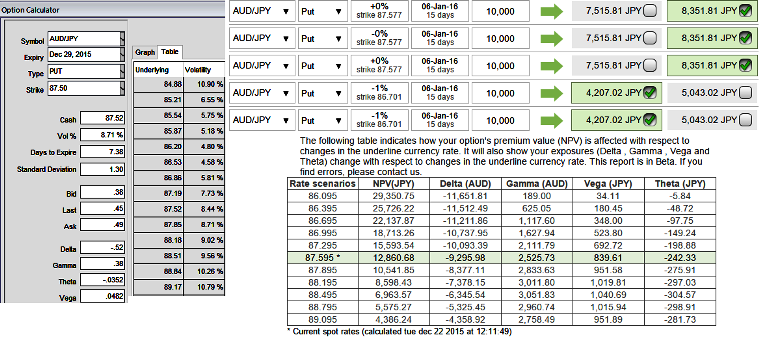
The implied volatility of 1W ATM AUDJPY put contract has nothing much changed, it is almost close to 8.71% which is quite on higher side that is good sign for option writers.
We know that the options with a higher IV cost more, intuitively due to the higher likelihood of the market 'swinging' in your favour. If IV increases and you are holding an option, this is good. You should also note short-dated options are less sensitive to IV, while long-dated are more sensitive.
As we expect the underlying currency exchange rate of AUDJPY to make a larger move on the downside in medium run. As shown in the figure purchase 2W 3 lots of At-The-Money -0.52 delta puts, and simultaneously short 3D 2 lots of (1%) In-The-Money put option.
So far we all know that the position uses long and short puts in the ratio of 2:1, now alter it into 3:2 so as to maximize the returns as we could sense the more downside potential but again it depends upon risk appetite and returns expectations.
Hence, as shown in the diagram weights have been doubled on short side and resulted into huge cash inflows for every small change in underlying exchange rate.
Entering into this AUDJPY position which has higher implied volatility at 8.71% and expecting for the inevitable adjustment is a smart approach, regardless of the direction of price movement.
Based on volatility and time decay, the strategy is a "price neutral" approach to options, and one that makes a lot of sense.